The Masterclass Guide to BBQ Back Ribs: Achieving Competition-Quality Results
Introduction: The Philosophy of Low and Slow
Few dishes in the pantheon of outdoor cooking command as much respect as a perfectly executed rack of BBQ Back Ribs. The goal is a delicate balance: meat that is tender enough to pull cleanly away from the bone with a gentle bite, yet firm enough to retain its structural integrity. This is achieved through the science of “low and slow” cooking, which allows the tough connective tissues (collagen) to melt into gelatin, basting the meat from within.
In this guide, we break down the classic dry-rub-to-wet-glaze method. Whether you are using a smoker, a grill, or a household oven, the principles of heat management and flavor layering remain the same. This is the meal that makes you lean back, wipe the sauce from your face, and appreciate the art of the barbecue. Don’t lose this recipe—it’s the only one you’ll ever need.
Ingredients: The Flavor Hierarchy
A great rib is built in layers—starting with the meat selection, followed by a dry aromatic rub, and finishing with a caramelized glaze.
The Main Event
- 2 Racks Pork Ribs: Baby Back ribs are leaner and more tender; Spare Ribs (or St. Louis Style) are flatter with more fat and flavor. Both work beautifully with this method.
- 2 Tablespoons Olive Oil: Acts as the “binder” to ensure the dry rub sticks to the meat.
The Dry Rub (The Foundation)
- 2 Tablespoons Brown Sugar:Encourages bark formation and caramelization.
- 1 Tablespoon Paprika: Provides the iconic deep red color and a mild, earthy base.
- 1 Teaspoon Each: Garlic Powder, Onion Powder, Black Pepper, and Salt. This quartet provides the essential savory “bite.”
The Glaze (The Finish)
- 1 Cup BBQ Sauce: Use your favorite high-quality brand, preferably one with a balance of vinegar and molasses.
- The Membrane (Crucial Step): Flip the ribs bone-side up. Locate the thin, silvery membrane (the pleura). Use a butter knife to loosen it at one corner, then grab it with a paper towel and pull it off. Removing this allows the seasoning to penetrate the meat and prevents a “leathery” texture.
- The Bind and Rub: Pat the ribs completely dry. Coat both sides with a thin layer of olive oil. Mix your dry rub ingredients in a small bowl and sprinkle generously over the ribs, pressing the spices into the meat. Let them sit for at least 30 minutes at room temperature.
- The Slow Cook: Preheat your oven or smoker to 275°F (135°C). Wrap each rack tightly in heavy-duty aluminum foil. This creates a steam chamber that breaks down the collagen quickly. Place on a baking sheet and cook for 2 to 2.5 hours.
- The Bend Test: Carefully open the foil. Use tongs to lift the rack; if it bends easily and the meat has started to pull back about 1/4 inch from the ends of the bones, they are ready for the glaze.
- The Glaze: Remove the ribs from the foil. Brush a thick layer of BBQ sauce over the top. Increase the heat to 400°F (200°C) or move them to a hot grill.
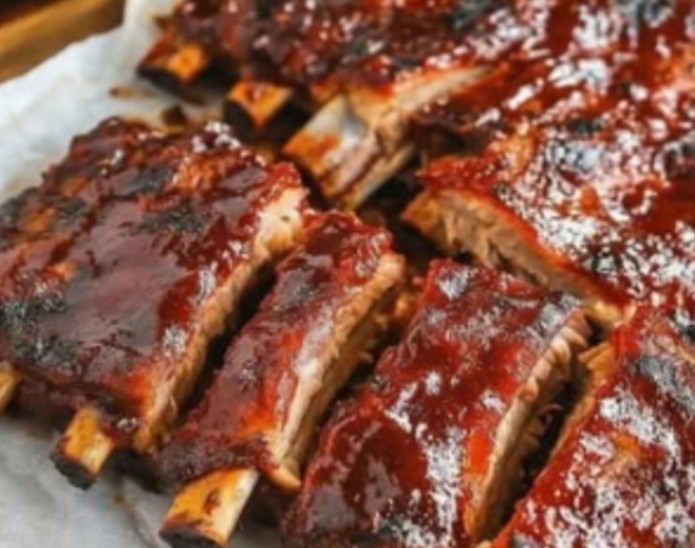
- The Caramelization: Cook uncovered for 10–15 minutes. The sugars in the sauce should bubble and become tacky, creating a “lacquered” finish. Watch closely to prevent burning.
- The Rest: Let the ribs rest for 10 minutes before slicing. This allows the juices to redistribute so the meat doesn’t dry out the moment you cut it.
- The Spicy Kick: Add ½ teaspoon of cayenne pepper or chipotle powder to the dry rub for a lingering heat.
- The Apple Infusion: Spritz the ribs with a mixture of 50/50 apple juice and apple cider vinegar every hour during the cooking process to add brightness and moisture.
- The Dry Rib: Skip the BBQ sauce glaze entirely. Instead, apply a second, lighter dusting of the dry rub 15 minutes before the ribs are finished for a “Memphis Style” dry rib.